

Window Safety Barrier Kit: Your Complete Guide to Installation and Safety
In this blog, we’re diving into everything you need to know about installing a Window Safety Barrier Kit. We'll take you through a clear, step-by-step guide to make the process...
In this post, we’re diving into everything you need to know about installing a Window Safety Barrier Kit. We'll take you through a clear, step-by-step guide to make the process as easy as possible, so you can safeguard your windows with confidence. From the tools required to detailed instructions, by the end you'll know how to secure your windows without sacrificing style.
Table of Contents
- Why Window Safety Matters
- What Is a Window Safety Barrier Kit?
- Choosing The Right Window Safety Barrier Kit
- Safety Without The Bulk
- Easy DIY Installation
- Final Thoughts
Why Window Safety Matters
Windows make a home feel bright and airy, but without the right safety measures, they can pose a risk, especially for young children and vulnerable individuals. According to RoSPA (Royal Society for the Prevention of Accidents), a significant number of accidents each year involve falls from windows, which is why UK building regulations now require safety barriers in certain situations. Whether you're a homeowner, landlord, or working on a new build, ensuring your windows are secure is a smart and necessary step.

What is a Window Safety Barrier Kit?
A window safety barrier kit does exactly what it says on the tin, it helps prevent falls without blocking ventilation. These kits typically include strong safety barriers, and a no-fuss installation guide. They provide peace of mind while keeping your space looking stylish and uncluttered.
Choosing the Right Window Safety Barrier Kit
Not all safety solutions are created equal. Here’s what to consider when selecting the best kit for your space:
- Material & Durability – Go for high-quality, corrosion-resistant materials like stainless steel that can handle daily wear.
- Sleek, Unobtrusive Design – No one wants their home to look like a high-security facility. A well-designed kit blends seamlessly into your space, offering protection without compromising style.
- Regulation Compliance – UK building regulations are tightening, so it’s crucial to choose a kit that meets current safety standards, especially for landlords and new developments.
Safety Without the Bulk
Gone are the days of bulky, prison-like security grilles. Modern fall prevention kits are designed to be sleek and discreet, offering essential protection while allowing in plenty of natural light and fresh air. They’re ideal for homes, schools, offices, anywhere that needs a stylish, safety-first solution.

Easy DIY Installation
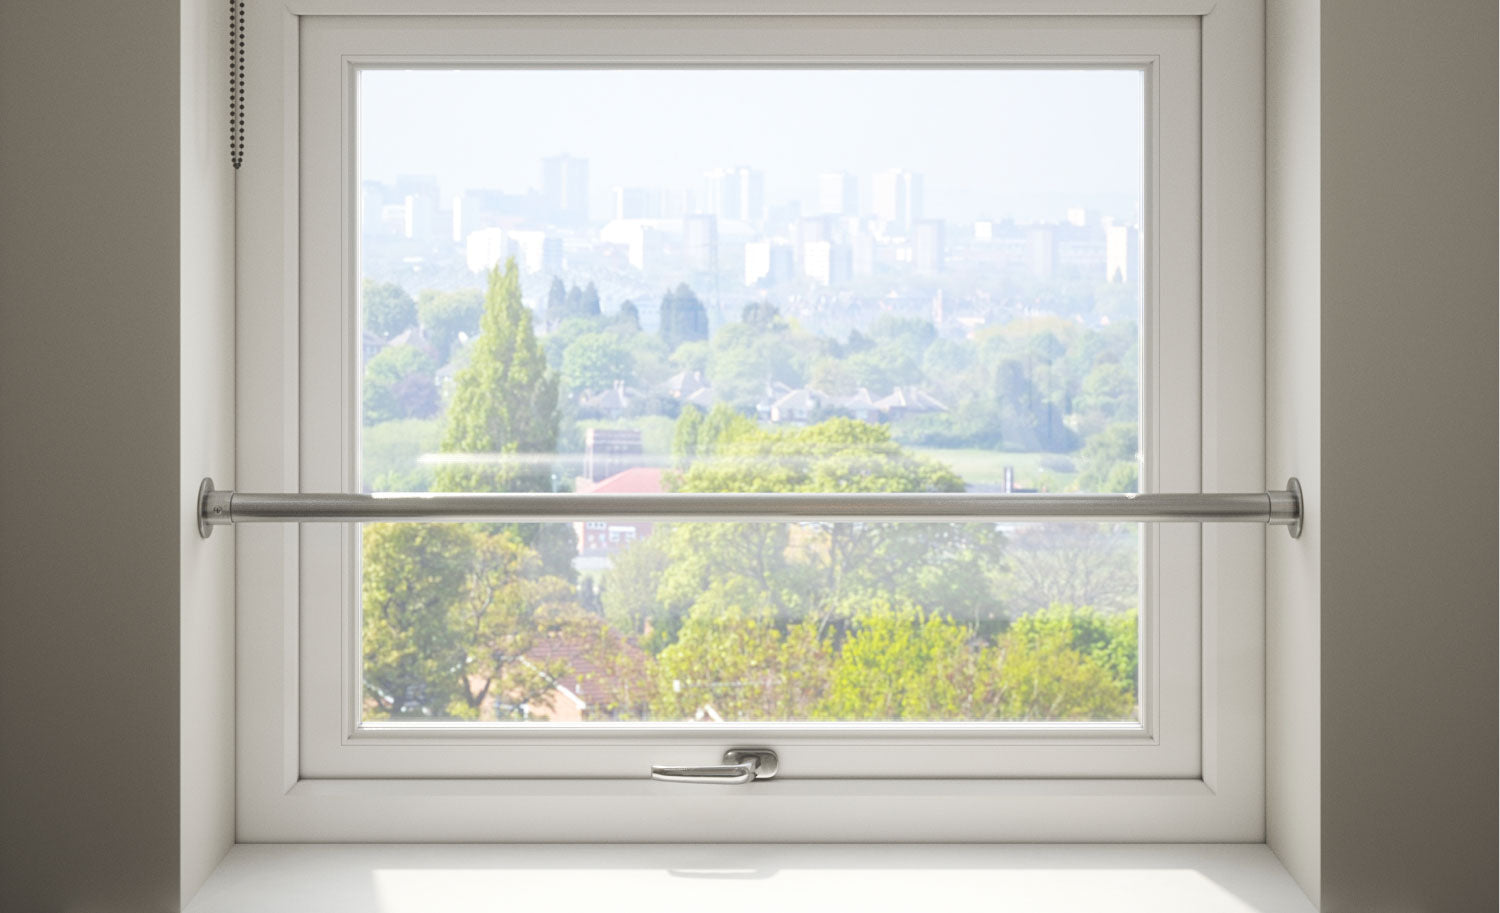
Looking at the Rothley Window Safety Barrier Kit for installation, it is straightforward and is suitable for DIY fitting. Here's how you can do it:
1. Preparation: Before you start, double-check that the wall where you plan to install the barrier is in good condition. Look out for any hidden pipes or cables that could get in the way. Gather all the necessary tools and materials: a drill, pencil, screwdriver, fine-toothed hacksaw (24-32 TPI), 4 x 60mm screws, and 50mm wall plugs.
2. Measure and Mark: Next, measure the length of the rail you need and mark it with a pencil. If you need to cut the rail, wrap low-tack tape around the cutting area to prevent slips then use the fine-toothed hacksaw to trim it about 5mm short of the pencil line to ensure a clean cut & perfect fit. Then, remove the retaining screw and cover from each socket. Measure and mark the exact height for the sockets, making sure there’s a maximum 100mm gap between the windowsill and the rail. Mark the position of the drill holes for the sockets to be installed.
3. Drill and Install Wall Plugs: Using the marked spots, drill holes in the wall to fit the 50mm wall plugs. Ensure the drill bit is the right size for the plugs. Insert the wall plugs into the drilled holes, ready to secure the sockets.
4. Attach the Rail: Slide the sockets and covers onto the rail. Pull back the covers slightly and insert the screws into the wall brackets. Once everything is in place, replace the covers and tighten the retaining screws to lock the sockets securely onto the rail.
5. Final Inspection: After installation, give the barrier a gentle test by applying pressure to ensure its stable and secure. Make any necessary adjustments to ensure the barrier is firmly attached and ready to provide safety.
For detailed instructions and visual guidance, refer to the installation manual provided with your kit or visit Rothley's official website.
Final Thoughts
The Rothley Window Safety Barrier Kit offers an easy way to enhance safety without compromising on style. Designed to meet UK regulations, they’re built to last, simple to install, and give you the confidence that your windows are secure. Independently tested to BS 6180:2011, it has been manufactured to withstand more than 75kg of lateral force; far exceeding the minimum safety requirement. In fact, the 1219mm kit surpassed the standard by an impressive 539%, giving you complete confidence in its durability and reliability. With safety requirements becoming stricter, now’s the perfect time to upgrade your windows…without spoiling the view.